


Modify Betaflight PID - using FrSky TARANIS
This is made possible using MSP over S.Port or S.PORT / MSP bridge method
This feature allows PID tuning through the TARANIS Radio


You will need
-
Betaflight 3.1.x firmware (now its official)
-
TARANIS RC /w OpenTX 2.2 firmware
-
Matching LUA script (PID Menu)
-
Receiver with telemetry S.Port eg. X4R
Notes
Most F4 Flight controllers(i.e Revolt F4) doesn't have inverted telemetry feature so if you're using FRSKY RX you might want to follow this mod: Smartport, the FrSky XSR, and Beta... (solder to green arrow )
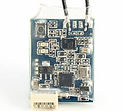
FrSky XSR 2.4GHz S-Bus Receiver
FrSKY
TARANIS X9D Plus


This was done for my F4 REVO FC -> www.rcgroups.com/REVO-F4.....
Latest FPV Gear


Latest FPV Gear
1. TARANIS Firmware Update & LUA script
I use this guide to flash the Taranis firmware: https://www.youtube.com/watch?v=DsbaftCHpHs
1) Go to: http://www.open-tx.org/2017/05/30/opentx-2.2.0
2) Select OpenTX Companion 2.2.0 - Windows Installer
3) Install the latest companion software -> Flash latest firmware
4) While turning on the TARANIS - If you get the Error msg: "SD CARD WARNING Expected version:2.2V000# Press any key"
That's because the new firmware expect a newer SD folder Structure that requires an update.
Inside the OpenTX firmare page (in open-tx.org) at the bottom of the page you will see:
SDCard content for 2.2.0
5) Download the zip file that matches your V000# number X9 for Taranis X9
and replace the SD content (make sure to save a backup)
Get the LUA Script here ( "BF.lua" )
https://github.com/betaflight/betaflight-tx-lua-scripts/releases
Downloding the LUA Script is much easier now than before.
Choose the latest "BFSetup-X9.....".zip file (X9 For the Taranis)
1) Copy SCRIPT folder to the root dir of Taranis SD card
2) To link the script -> go to screen DISPLAY 13/13,
next to Screen 1 Select "Script" and select the LUA script file name.

2. Flashing Betaflight 3.1 firmware
Betaflight 3.1 firmware is now officially released:
https://github.com/betaflight/betaflight/releases/tag/v3.1.7
Flash the new Betaflight 3.1 firmware either locally or online using the betaflight configurator
3. Telemetry Settings & Connections
Connect the S.port (Receiver) to the UART 2 TX (FC) - this protocol can send and receive data
Betaflight GUI - Ports tab
In the UART 2 line under Telemetry choose from the dropdown: SmartPort (AUTO)


Betaflight GUI - Configuration tab
Make sure Telemetry switch is turned ON

In order to verify that telemetry is working
(Props OFF at all times - connect Battery)
In the TARANIS go to telemetry menu (13/14) -> press Discover new sensors
Verify that you see all 10 sensors updates and working
IF MSP is active on UART 1 - you'll get values only when ARMED
4. PID MENU - Run LUA Script
While in the home screen of the TARANIS -> Long press on PAGE button to launch the menu
Change PID Settings
-
Store or Reload values - Long Press MENU button
-
Switch screens - Short Press MENU button
-
Navigate between values - "+" & "-" buttons
-
EDIT value - Press ENTER
I've followed this guide: http://copterjungle.de/betaflight-pids-und-unify-pro-ueber-frsky-taranis-einstellen/
I appreciate the original work done by the guide owner
Dear FPV pilot, read before commenting,
if you encounter any issues, feel free to share them in the comments section bellow,
please attach: screenshot of your PORTS tab, 2 pictures of your RX and FC with all the connections (focused pictures only)
- Check if you see 10 sensors in the Radio telemetry page and mention that in your comment.
- If you have a new XSR and it's not working maybe you need to update the XSR firmware.
- Write your OpenTX firmware version you used.
- Write which RX and FC models are you using
Insane FPV Sales For the 11th Annv
comments section
(Takes time to load, wait for it...)